Monday, December 9, 2013

Refrigerator pickles without the refrigerator!

Over three months I was knee deep in pickling cucumbers. My favorite us of them is refrigerator dill pickles. I've canned pickles many times but I find them to be pretty mushy which ruins them for me. 
A few jars of pickles went into the refrigerator and with the rest we decided to try an experiment this year, refrigerating them in the spring!

Our spring generally runs year round and only slows to a trickle when we haven't gotten enough rain. It flows down to a pool that my husband has been working on to raise fish in. The water temperatures vary from the 30's to 50's throughout the year. With the constant inflow of water from the spring it never freezes.


At the top right of the deck you can see the solar panel and the water pump. It sends water to the hoop house and garden. In the spring pool on the left you can see the crate of pickle jars covered with a feed bag to keep the sun out.


I put each jar in to plastic bags to protect them but some have leaked.

This is one that had leaked. The bag had formed algae on the outside and was still protecting the jar.


 The jar was clean and completely sealed! And so far the pickles taste great!


Sunday, November 24, 2013

Fall cold snap

If November is any inclination, we're in for a rough winter this year! This morning we were at 13°F with winds blowing 20-30 mph, and we're expecting single digits tonight! We've had temperatures in the teens three other times this month.

So far the plants in the hoop house are doing well. When the temperatures get near freezing we put a row cloth over the plants for extra protection. The beets have wilted a little from frosting but that may be because they are planted closest to the edge of the hoop and are dealing with the most cold. We've picked quite a bit of lettuce and radishes though!


Over night, along with the cold temperatures, we got almost an inch of snow with more squall expected during the day.


My husband dusted off the south wall of the hoop house and as soon as the sun came out it quickly warmed up into the 20's and 30's. By noon it was 55° in the hoop when outside it was 19° and windy!


Inside the row covers are draped over all the plants to give an extra layer of protection. We watered everything well yesterday to keep the humidity high.


 Under the row covers the lettuce and radishes were frosted but were fine once the temperature warmed up. If we had not purchased cold hardy varieties they wouldn't have handled it.


fresh radishes when it's snowing outside!

I would love to be able to pick lettuce clear through winter but we'll just have to see what kind of winter we end up having and how much the plants can tolerate. 


Sunday, November 17, 2013

Cloth napkins for everyday use


Cloth napkins being made for everyday use do not have to be complicated. If I was going to make some for more formal occasions I might sew them with some nice mitered edges like these over at Design Mom. But for these a simple zigzagged edge will do.


Any fabric can used: leftovers from other sewing projects, sheets, old flannel shirts or some nice linens bought just for the project. I cut my fabric into 13" squares but anywhere from 12-20" is a good size, it's just personal choice.

Once the fabric is cut, use a sewing machine with matching thread to zigzag around the edge.


Fold up your napkins and stack them in a napkin holder on your table. As they are used they can be tossed in with your regular laundry. See, really simple! And now you don't have to buy disposable napkins anymore!

Monday, November 11, 2013

A solar water pump for the garden


Our garden and hoop house are across the street from our house. So watering always meant either dragging a long length of hose across the road from the house or bringing buckets of water to fill the watering cans with. Neither one was really practical.

When we build the hoop house in the spring Hubby wanted to install some kind of watering system for it. He wanted to draw from a spring fed pond 700 ft away and 50 ft lower in elevation from the gardens.


What he came up with was  a perfect solution, a solar powered water pump that would push the water up the hill to the gardens!
He purchased this on demand water pump from Northern Tool. A 30 watt 12 volt  solar panel charges a 12 v 115 amp hr deep cycle battery through a charge controller. The pump is powered directly from the battery and when not being used the solar panel keeps the battery fully charged.


To keep the electric components protected from the weather he place a plastic tote over top and screwed it to the deck to hold it in place.

The water is pumped through 700' of 3/4" black poly pipe. At the top of the hill the pipe is split, one end running to the hoop house and the other to the garden. Spigots are at each end of the pipes so we can connect either irrigation hoses or garden hoses with sprayers to hand water. 

So far it has worked perfectly! The solar panel is able to keep the battery fully charged and we are able to water a few times a week without any trouble, we've never drained the battery.

If you want some more details on the project, check out a very in depth article that was done over at Build it Solar!!

Thursday, November 7, 2013

The fall hoop.


I am just realizing that I never wrote about the fall planting in the hoop,,shame on me!

We built our first hoop house this spring and in the summer grew tomatoes, peppers, eggplant, watermelon, and herbs in it.


Here it is at the peak of the summer! The tomatoes were touching the ceiling and the whole thing looked like a mini jungle!


Hubby went over to Johnny Seeds where they have a great variety of veggie seeds recommended for hoops and greenhouses. He picked out a few things that are cold hardy and would thrive in the hoop into fall.
The varieties we went with are:


The second week in September we cleared everything out of the hoop house and planted our fall crops. (We calculated that if we planted any later than that the plants would not have enough time to grow before it got too cold)

Now we catch up to now....

 November and we are still gardening! The beets and spinach seem to be slow. We've had to reseed them a couple times, they just weren't coming up well, we're not sure why. Everything else looks great! The lighter green is the leaf lettuce followed by the bib lettuce behind it. We even threw in some radish seeds that we had left from the summer garden. They grow so fast we've already harvested a bunch. Behind the bib lettuce is a row of spinach, followed by the carrots and the beets behind them. The carrots did well from the get go, germination was really good. Also my pot of parsley that's been sitting there since summer still looks good.

Two days ago we had an unexpected cold snap that sent temperatures down to 19 degrees over night. (Pretty cold for this time of year) Hubby purchased some row cloth just in time and we draped it over the plants the day before.
Now check this out....        

The day after that cold snap and we were harvesting for a salad! Fresh lettuce and radishes! The majority of the plants looked fine with only the larger beet plants showing some wilting on a few leaves.

With this success so far I'm realizing that I could be harvesting for a fresh salad for Thanksgiving and should not have to buy lettuce for most of the year. Pretty amazing!

Homemade train costume!

Train Costume!

My youngest son (5) is really into trains,,, I mean obsessed with them! So when my daughter suggested he be a train for Halloween he was thrilled with the idea.
When making a costume I try to scrounge as much materials as I can from around the house. This one is mostly cardboard with some suspenders borrowed from my husband.


 Two cardboard boxes and a cardboard tube (you know, the ones used for concrete footings) were assembled into the basic train shape. I hot glued them together first and then went over each seam with paper mache. (a typical homemade recipe, 3C flour, 3C water) After than dried I was still concerned about the boxes falling apart so I reinforced the joints with duct tape, on the underside and inside, where it wouldn't be seen. Three holes were cut out for windows.


I cut two holes for the chimney and headlight before painted. The chimney is a scrap piece of vent pipe and the headlight is the top of a Pringles can. I used spray paint to give it a nice even coat.


Here's a closer look at the headlight. When the cap is removed a light can be put inside during Trick-or-Treating. We used a head lamp but a small flashlight or glow sticks would work too.


An essential of this costume was that candy be able to go down the chimney...

....by cutting an extra hole the candy can go down the chimney and into the box below. My son really loved this part!


My biggest dilemma with this costume was how to attach the suspenders to the inside of the costume. I was concerned that any holes I made would weaken the boxes and cause tearing while he was wearing it. What I came up with was this...
With my duct tape I created flaps on the inside of the box that the suspenders could be attached too. This held really well!


 Some cardboard wheels and Paper accents and this is the end result! We did have to add a small block of wood to the back of the costume since it's so front heavy.


 He loved it!! We got three uses out of it before a rainy Halloween started turning the cardboard into mush. But it lasted as long as we needed to so I'd say it was a success, and we got complimented on it everywhere we went!!


Saturday, October 5, 2013

Fall activities: leaves, terrariums, and mini indoor moss gardens!

Fall is in full swing here in NEPA and our trees are at peak color. When the leaves start changing one of our traditions is to take a walk in the woods and collect some pretty leaves. We take them home and the kids and I paint leaf prints. They really look forward to this.


While we were walking I noticed we had quite a variety of moss and lots of it! So, I started collecting. My first project was a terrarium. I always had this idea in my head of one that looked like a little town in a jar. What I came up with was pretty cute:
After a few days I noticed a problem,, the buildings started to develop mold. I took them out so it wouldn't start causing a problem with the plants and I'm still trying to figure out how I can get them back in there without the mold problem. Hubby suggested soaking them in a salt water solution and then letting them dry before painting. (to deter the mold growth) I'll give that a try and see if it works.


With the left over moss my daughter and I put together some small moss gardens. I might like these even better than the terrarium! The are small clay saucers that I put a 2 inch layer of soil in before adding the moss and decorations.


In this one we added some small decorative rocks and some little painted buildings. (monopoly buildings) Since this isn't closed up like the terrarium is I shouldn't have to worry about mold problems. 


This one might be my favorite. I buried some smaller pots to add some height to the display. The same assortments of moss are used along with some rocks (one a painted welcome sign), and sticks.


This one is a mini Stonehenge. I made the stone pieces with this recipe for sand dough. Once dry they really look like stone pieces. I still need to add a clear coat to these. Again some small decorative rocks were added, they add just a little color.

Now, how do I stop myself from putting one in every room of the house?

Thursday, August 29, 2013

Garden Update


 The garden has been amazing..well for the most part. Our yearly complaint is slugs. I really can't believe how many we have. They seem to attack every seedling and are quite fond of the cabbage. An interesting discovery was that the salt in our fertilizer seemed to keep them at bay.
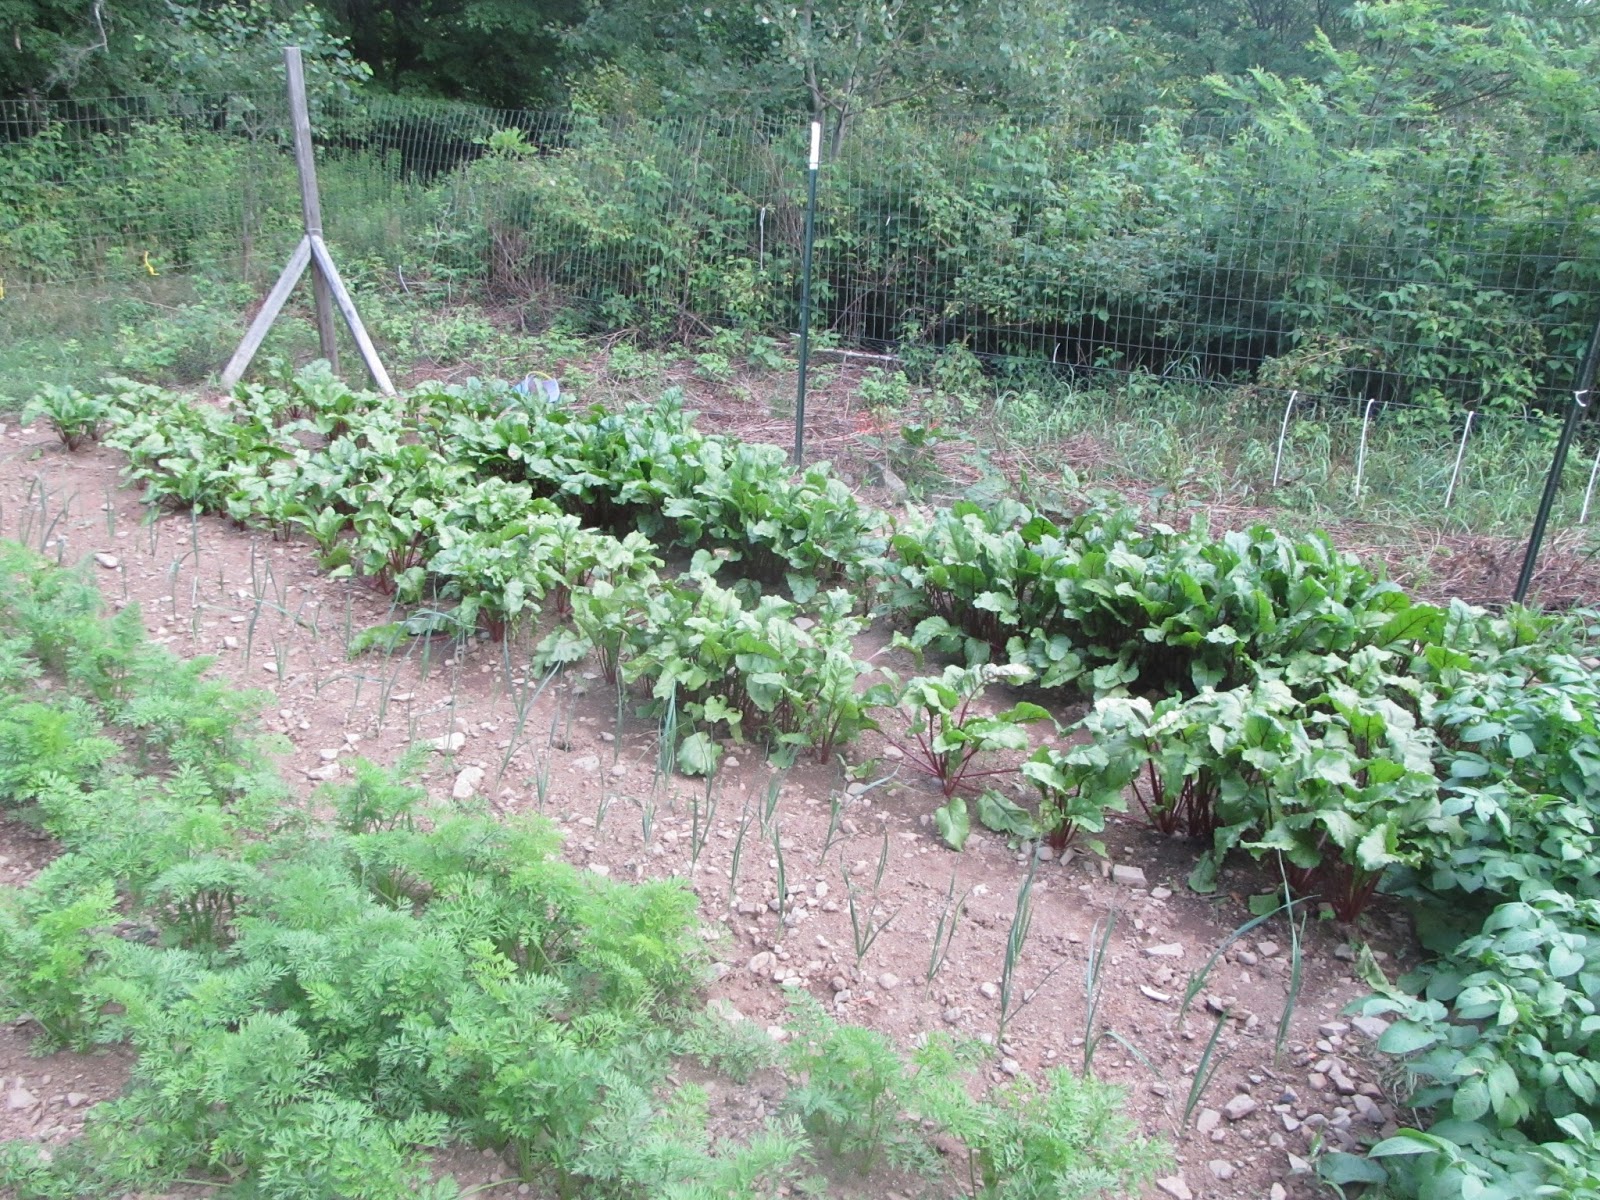
Here are our beets, leeks, and carrots. This picture is a couple weeks old. Since then the leeks have gotten bigger and we've picked and canned the carrots.
carrots, leeks, and beets


The potatoes grew amazing as always. They are one of our best plants every year. Hubby planted a mix of red potatoes and russets this year. The red potatoes produced a lot more spud than the russets did. (Although the russets still grew well.) From now on I think we'll stick to red or white potatoes, they seem to do the best. Again, this picture is a couple weeks old. The plants are dying back now and I've started canning potatoes as hubby digs them up.
potatoes


The patty pans, zucchini and yellow squash are other great growers. (you can see them in the back left of the potato picture) I'm impressed with the size those plants get to, nearly 4 feet. (I'll have to get a picture of them) Unfortunately my pickling and slicing cucumber have gotten hit with fungus shortly after they really started to produce. Fungus seems to be another problem we have and I think we'll have to get varieties that are more resistant to it. The patty pans are showing signs of it as well. Thankfully I was able to get a bunch of refrigerator pickles made. Even though the plants are still producing I don't know how long they'll last.


We accidentally planted gourds inside the garden. (it was suppose to be mini pumpkins) They have taken over a corner of the garden but, on the bright side, are producing some very nice gourds.


harvest of cucumbers, mini pumpkins, cabbage, patty pans, zucchini, yellow squash, beets and potatoes.


Another complaint is the darn deer. I attempted to plant "jack be little" pumpkins, butternut squash, gourds, and sunflowers on the outside of the garden. Everything grew great until the deer found them and started feasting on them. Luckily Hubby sent a few of the butternut and pumpkin vines into the fenced garden where they can be protected so I will get some production off of them. Also I had a few potted pumpkin plants that I put into the garden as Hubby pulled potatoes and freed some space.

The only thing that saved my sunflowers is the fact that they're 10 FEET TALL!

...aren't they amazing!? They have no leaves up about 4 ft (thanks to our friends, the deer), and the gourds and pumpkins planted behind them hardly have any leave on them. However, I will manage to get a dozen little pumpkins off of them.  This is my first year growing sunflowers and I am loving the size of these big guys! I think I'll be growing them again.


The hoop has been absolutely amazing! We've enjoyed it so much that we're planning to put another one (even larger) up next year. We don't have the issues with slugs and fungus that the outside garden is susceptible to. The plants are protected from heavy rain (so no fungus) and being closed in keeps the slugs from getting to our plants.
The jungle in this picture is our tomatoes that have reached up to the ceiling! Large slicing tomatoes are on the left and cherry tomatoes are on the right. Behind them are peppers, eggplant, watermelon, and cucumbers.


My eggplants are doing well. When we planted them out in the garden last year the plants were half this size and I got a handful of tiny eggplants.
eggplant

These pepper plant are about 4 feet tall and COVERED in blossoms. Last year, planted in the outside garden, I had tiny 2 foot "bushes" that never produced a single pepper.
peppers

 I'll get some picture of the watermelon soon. We've found about a dozen melons but the plants are so thick it's hard to find them all. Into September we'll be pulling a lot of these plants to start our fall garden in the hoop. Potentially having fresh veggies into late fall and early winter will be great if all goes well!!

Tuesday, July 23, 2013

The produce stand

A few years ago I set up a little table by the road, just to sell the extra zucchini from the garden. It was either that or start dropping it at my neighbors door steps and running away. Hubby even built me a little shed for my table (which also doubles as a bus stop for the kids in the winter) Over time I started adding a few more things: some eggs from the chickens, other veggies,,,whatever extras we had that I wasn't already canning, freezing, or drying. 


This year we started thinking about making into a real market stand. If we're lucky, even a part time job. Our location is good. Even though we live in a very rural area, there are a lot of lakes with summer homes around them, so May through September we get a lot of tourist traffic.

We made up a bunch of signs. Just some 1 x 6's painted, with hook and eyes to hang them, and stenciled with the different veggies on them. Whatever is available at the stand is hung up.


I still have more signs to make. I seem to be painting them as the crops are ripening. They're done with an exterior gloss paint so they're fine getting wet. With some old storm windows I made a few dry erase boards by painting the back side of the glass white. One is my price list on the back wall of the stand. The other is my open sign and also for notes like products that are coming soon, or things I haven't painted a sign for if I'm not planning to sell a lot of it. 

As we've added more things to the stand I've been surprised what the big sellers have been. At first I added a few beets just to give me more variety and make the table look good. After selling 40 beets I'm starting to think people like them, and maybe I should plant more next year. The wild blueberries are always a good seller, a lot of work to pick, but worth it. Green beans sell well. My zucchini and patty pans have just started coming, but now they should be on the table every day. I keep a cooler with ice in it for things that won't do well out in the heat like eggs, and bags of lettuce and spinach. 

One of my biggest problems was figuring out what prices to sell our vegetables for. Hubby found this web page for the "USDA Agricultural Marketing Service".
You can search a particular vegetable, even by variety. It will give you an average price for that item with more detailed statistics below that. You can select nation or regional prices, and the dates you want prices for. It's a really great tool.

So I guess this year is a bit of an experiment, we'll put out a bit of everything, see what the good sellers are so we know what to plant more of next year. Hubby wants to put up a few big hoop houses, it addition to our little hoop, so we can grow a lot more. I think we could do well with this!

my cute little produce stand


Time to cut hay...

It's time to make hay for the goats winter feed. A couple of weeks ago I thought I would have a good opportunity to cut a bunch. Then, after only three days of cutting, it started raining. And it rained, and rained, and rained. The last bit that I had cut didn't get to dry fully, so it ended up in the goat's shed for bedding.

Now last year I thought we had stored a ton of hay but it only lasted 2 months and we had to buy some bales to last the rest of the winter. I'm hoping to get even more dried this year.

We don't have a big farm, so we don't have large tractors, or big haying equipment. All of our hay is cut by hand with a scythe, dryed, and piled into our hay shed to store. My husband bought his scythe at: https://scythesupply.com It's an american company, located in Maine. They custom make the snath (handle) for your height and have a big selection of blades.
Hubby made this video a fews years ago showing the scythe in use. It's a little tougher for me to use because I'm much shorter than he is. One day I'll get one made for me.

I cut a couple rows each day, cutting for about an hour each time. The same amount probably takes hubby half the time. After it dries for a day the rows are flipped. A few hours to a day later (depending on how warm and dry it is) I rake the rows into piles. To dry it even quicker the rows can be spread out evenly across the ground and then raked back into rows once dry. We've done it both ways. 


 We use our UTV to transport the piles to our hay shed and stack it as high as we can, using some boards to retain the edge of the pile. 


We even get the kids in on the fun (fun?). After each layer is added the kids get to climb on top to stomp everything down well, making room for more hay and, essentially, making one big bale of hay. This video was made over 5 years ago before our youngest was born. I love looking back at these old videos!


To feed this loose hay to the goats I use a pitch fork to grab hay and load it into a large storage tote. You know, those big plastic ones:
It gives me something to carry it in without just walking around with a huge pile of hay in front of my face, leaving a trail as I walk :P

Carrot